Step-by-Step Guide to Building a MERN Stack Application

I'm a passionate full-stack developer with a knack for turning complex problems into seamless web solutions.
My journey began at Minviro, where I blended technology with environmental advocacy, crafting accessible tools to make a real-world impact.
I thrive on the challenges of the digital world, especially in creating intuitive, user-friendly experiences.
My toolbox is filled with JavaScript, React, TypeScript, and Node.js, but it's my curiosity and eagerness to learn that truly define me.
I'm on a mission to build things that not only look great but also make a difference. In my world, every line of code is a step towards a more connected and sustainable future. Let's create something amazing together.
Introduction to MERN Stack
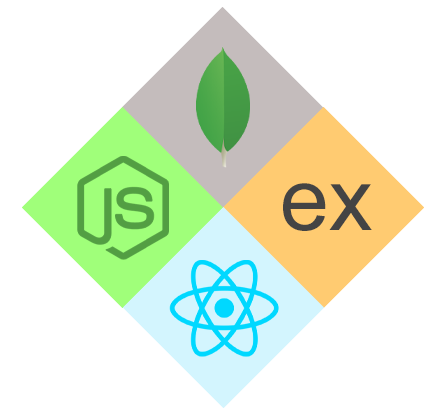
The MERN stack is a combination of technologies used for building modern web applications. MERN stands for MongoDB, Express, React, and Node.js. MongoDB is a NoSQL database, Express is a web framework for Node.js, React is a JavaScript library for building user interfaces, and Node.js is a server-side platform for building scalable and high-performance applications. The MERN stack provides a complete end-to-end solution for building web applications, making it a popular choice for developers.
Step 1: Defining the project requirements and goals
Before starting any project, it's important to define the requirements and goals. This will help you determine what features to include and what technologies to use. You should consider the following when defining the requirements and goals for your MERN stack project:
The purpose of the project
The target audience for the project
The features and functionality of the project
The expected performance and scalability of the project
The timeline and budget for the project
Step 2: Choosing a MERN Stack Boilerplate or Starter Kit
There are many MERN stack boilerplates and starter kits available online that can help you set up the initial file structure and dependencies for your project. When choosing a boilerplate or starter kit, consider the following:
The level of customization available
The quality of the code and documentation
The ease of use and setup
The popularity and community support
Here's an example of a MERN stack boilerplate that uses create-react-app to set up the frontend and express-generator to set up the backend:
npx create-react-app my-app
npx express-generator
Step 3: Planning the Data Model for MongoDB
One of the key components of a MERN stack application is the data model, which defines the structure and relationships of the data that will be stored in the MongoDB database. The data model can be represented in JSON format, which is a lightweight data interchange format that is easy to read and write.
Here's an example of a simple data model for a user model in JSON format:
{
  "_id": ObjectId(),
  "name": {
    "type": "String",
    "required": true
  },
  "email": {
    "type": "String",
    "required": true,
    "unique": true
  },
  "password": {
    "type": "String",
    "required": true
  },
  "date": {
    "type": "Date",
    "default": ISODate()
  }
}
In this example, the data model consists of a user with properties such as name, email, password, and creation date. The _id property is a unique identifier generated by MongoDB for each document in the collection.
It's important to carefully plan the data model for your MERN stack application to ensure that the data is structured and organized in a way that supports the application's requirements and makes it easy to retrieve and manipulate.
Step 4: Setting up the Backend REST API with Node.js and Express
Once you have defined your data model, the next step is to set up the backend REST API using Node.js and Express. The REST API will serve as an interface between the frontend and the database, allowing your application to retrieve and manipulate data stored in the MongoDB database.
To get started, you'll need to install Node.js and npm, which can be done by following the instructions on the Node.js website. Next, you'll need to create a new project directory and initialize it as a Node.js project using npm.
Next, install the required dependencies, including Express, Mongoose, and Body-Parser, by running the following command in the project directory:
npm install express mongoose body-parser cors
Once the dependencies are installed, you can set up the Express server by creating a new file named server.js and adding the following code:
import express from 'express';
import mongoose from 'mongoose';
import bodyParser from 'body-parser';

const app = express();

// Connect to MongoDB
mongoose.connect(
  'mongodb://localhost/your-database-name',
  { useNewUrlParser: true, useCreateIndex: true }
);

// Parse incoming request bodies in a middleware before your handlers, available under the req.body property.
app.use(bodyParser.json());

// Define a route for the root URL
app.get('/', (req, res) => {
  res.send('Hello World!');
});

// Start the server
const port = process.env.PORT || 5000;
app.listen(port, () => {
  console.log(`Server running on port ${port}`);
});
In this example, we connect to the MongoDB database using Mongoose, set up a middleware to parse incoming request bodies using Body-Parser, and define a simple route for the root URL that returns a "Hello World!" message. The server is set to listen on port 5000, but you can specify a different port if needed.
With the basic Express server set up, you can now start defining routes and implementing the REST API endpoints for your MERN stack application. These endpoints will allow your application to retrieve, create, update, and delete data in the MongoDB database.
You can then test the backend API by sending a GET request to the endpoint using a tool such as Postman.
Step 5: Building the Frontend User Interface with React.js
React.js is used to build the frontend user interface for your MERN stack project. React allows you to build dynamic and interactive user interfaces using components and state.
Here's an example of a simple React component that displays "Hello World":
import React from 'react';

const HelloWorld = () => {
  return (
    <div>
      Hello World
    </div>
  );
};

export default HelloWorld;
Step 6: Integrating the Frontend and Backend
Once the backend REST API and frontend user interface have been built, you can integrate them to create a complete MERN stack application. You can use axios or fetch to make API calls from the frontend to the backend.
Here's an example of using Axios to make a GET request to the backend API:
import axios from 'axios';

axios.get('/api/data')
  .then(res => {
    console.log(res.data);
  })
  .catch(err => {
    console.error(err);
  });
Step 7: Testing the Complete MERN Stack Application
Before launching your MERN stack application, it is important to test it to make sure that everything is working as expected. This includes testing the frontend, backend, and database interactions.
To test the frontend, you can use tools like Jest or Mocha to write unit tests. For example, in Jest, you can write a test like this to validate the behavior of a component:
import React from 'react';
import { shallow } from 'enzyme';
import MyComponent from './MyComponent';

describe('MyComponent', () => {
  it('renders correctly', () => {
    const wrapper = shallow(<MyComponent />);
    expect(wrapper).toMatchSnapshot();
  });
});
You can also use tools like Cypress or Selenium to write end-to-end tests that test the application as a whole.
To test the backend, you can write integration tests that test the REST API endpoints and validate the responses. You can use tools like Postman or Insomnia to manually test the endpoints, or you can write automated tests using a library like Supertest.
For example, in Supertest, you can write a test like this to validate the behavior of a REST API endpoint:
const request = require('supertest');
const app = require('../app');

describe('GET /api/users', () => {
  it('responds with a 200 status and an array of users', async () => {
    const response = await request(app).get('/api/users');
    expect(response.statusCode).toBe(200);
    expect(Array.isArray(response.body)).toBe(true);
  });
});
To test the database, you can write tests that validate the data stored in MongoDB. For example, in MongoDB's native query language, MongoDB Query Language (MQL), you can write a test like this to validate that the users collection has the expected number of documents:
db.users.find().count()
Once all the tests are written and passing, you can be confident that your MERN stack application is ready for launch. It's always a good idea to perform regular testing and maintenance to ensure that your application continues to function as expected over time.
Step 8: Deploying the MERN Stack Application to a Hosting Platform
Now that we have completed the development of our MERN Stack application, it's time to deploy it so that others can use it. For deploying a MERN Stack application, we need to host both the backend and the frontend.

For the backend, we can use a service such as Render. Render is a cloud platform that makes it easy to deploy and manage web applications. With the platform, we can deploy our Node.js and Express backend with just a few clicks, and Render will take care of all the underlying infrastructure for us. To deploy to Render, we need to sign up for an account and then create a new web service. From there, we can connect our Github repository to Render and choose a branch to automatically deploy from.

For the frontend, we have a couple of options. Two popular choices are Netlify and Vercel. Both Netlify and Vercel are static site hosting platforms that make it easy to host and deploy modern web applications. To deploy to either platform, we need to sign up for an account and then connect our Github repository. From there, we can choose a branch to automatically deploy from and configure any build settings we need.
In both cases, once we have connected our repository and set up the automatic deployment, our MERN Stack application will be live and accessible to the public. With Render and either Netlify or Vercel, we have everything we need to host and deploy our MERN Stack application with ease.
Step 9: Monitoring and Maintaining the MERN Stack Application
After deploying the MERN stack application, it's important to monitor it for performance and security issues and to implement regular maintenance to keep it up-to-date and secure.
Conclusion
In conclusion, building a MERN stack application involves several steps, including defining the project requirements, choosing a MERN stack boilerplate, planning the data model, setting up the backend REST API, building the frontend user interface, integrating the frontend and backend, testing the complete application, deploying to a hosting platform, and monitoring and maintaining the application. By following these steps and considering future considerations, you can build a successful MERN stack application.


